Camper De-Winterization Comprehensive Guide
When spring arrives, not only do the days become longer, but the anticipation of using your RV or camper once again begins to build. It’s time to get your RV ready for the season by doing the spring maintenance tasks. This RV & Camper De-Winterization with This Comprehensive Guide will help you get your RV or camper clean and ready for use once again after storing it for the winter.
1.) INSPECT THE TIRES
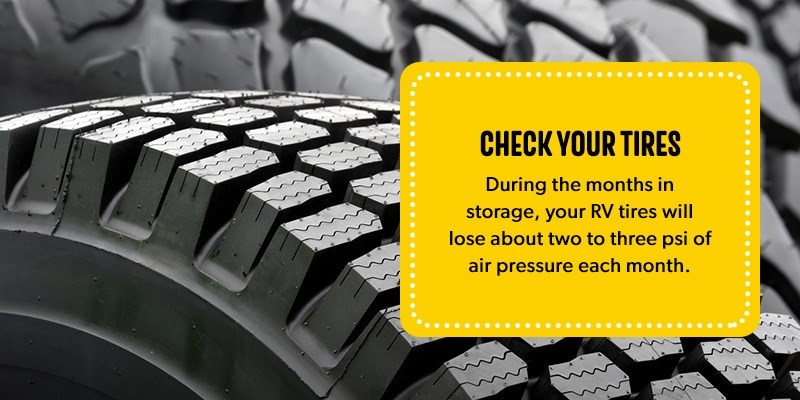
Your recreational vehicle’s tires will lose roughly two to three pounds of air pressure every month while in storage. It’s possible that your RV’s tires will be even more deflated in the spring if you kept it in a chilly place throughout the winter. Poor control, uneven tread wear, a blowout, and possible collision are all results of driving an RV with underinflated tires. The National Highway Traffic Safety Administration reports that in 2017, tire condition had a role in 655, car collisions, and 738 deaths.
All of your RV tires, including the spare, should have their air pressure checked with a tire pressure tester. Adjust tire pressure according to the manufacturer’s load recommended. Check your RV’s handbook for the recommended tire pressure if you are uncertain.
Look for indicators of deterioration, such as cracks in the sidewalls or worn treads, while evaluating your RV’s tires. New RV tires are a good investment at the start of the season, particularly if you have any long-distance trips planned.
2.) CHECK OUTSIDE FOR DAMAGE
Inspect the exterior of your RV for any signs of corrosion, leaks, or fractures before entering into more extensive RV spring maintenance.
Replace any weatherstripping that is damaged around windows and doors.
If the seals on the body, roof, or slides are damaged, replace them.
Inspect the roof for signs of water damage if you kept your RV outside during the winter, since excess weight from snow may cause structural damage or seams to fracture.
Work on the RV roof with extreme care to avoid injury.
Check for corrosion and other damage to the hitch components if your camper can be towed. Fix any broken pieces before you’re in an accident or stranded with a busted hitch. Camper De-Winterization Comprehensive Guide

3.) REPLACE AND RECHARGE YOUR BATTERIES
Similar to how RV tires lose pressure when in storage, RV batteries lose a certain amount of charge from internal leaks. Your RV’s batteries lose a fraction of their charge every month they sit in storage if you don’t check on them and replenish them.
Keeping your RV’s batteries charged while it’s stored is the best way to ensure they last until the next camping season.
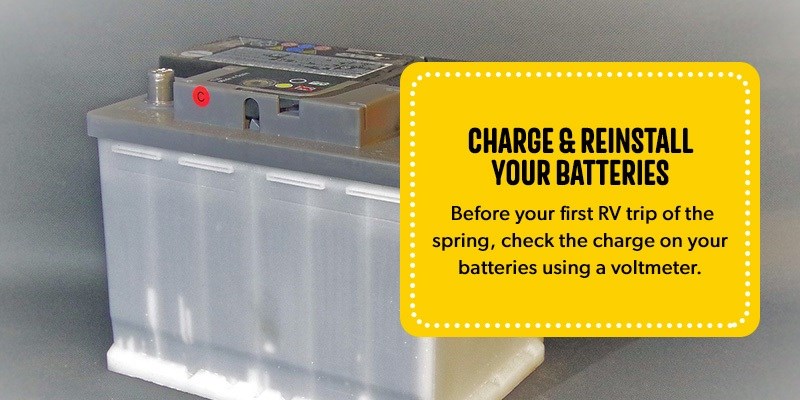
Inspect the volt reading of your RV’s batteries before setting out on your first trip of the season. Make sure the recreational vehicle is disconnected from the power grid before taking the reading.
A fully charged RV battery with a nominal voltage of 12 volts will register closer to 12.7 volts. Before taking your RV on the road, be sure the battery has at least 12 volts of power.
If you want to charge your RV’s batteries, you should connect the battery charger to the RV charger when the battery charger is off. Charge the battery fully by activating the charger.
Your RV’s batteries might need anything from a few hours to many days of charging time, depending on their size.
After charging, make sure the battery is at the proper water level by adding distilled water. Before charging a battery, check to make sure the plates are covered by water and add water if necessary.
Make sure the RV battery is firmly connected when you replace it. Get in touch with an RV repair agency to examine and reinstall your batteries if you aren’t comfortable doing it.
4.) DECONTAMINATE YOUR WATER SYSTEM
One of the most important RV spring preparations is de-winterizing your water system. A reliable supply of potable water is essential for daily life on the road, including food preparation, dishwashing, and personal hygiene.
However, you probably avoided frozen pipes by adding non-toxic RV antifreeze to your water system in the autumn when you winterized your RV. In order to make the water safe for consumption again, it is necessary to flush the antifreeze from the pipes.
If anti-freeze was accidentally put to the freshwater storage tank, the first step is to empty it completely. Follow these methods to flush antifreeze from your camper water system:
Fill the freshwater tank back up with drinkable water.
Start the water pump up
Turn on the water to every fixture, including the interior and outdoor showers and sinks.
For many minutes, let water stream through the system.Try flushing the toilet a few times while the pump is on.
It’s OK to switch off the pump and the taps after the water has cleared.
The water heater must be taken out of bypass mode.
If you took out the water filter cartridges to store them, put them back in.
Empty your wastewater tanks (both gray and black) at a designated disposal.
You should also drain the RV antifreeze from the water heater tank, collect it, and dispose of it if the heater was not set into bypass mode for winter storage. This must be done before the water filters may be changed.
The antifreeze taste should be gone after cleansing the system for several minutes, but if it persists, baking soda may be used to mask the aftertaste.
If you want to clean your drains, you may either sprinkle baking soda down them or pour a solution of it down them. The water has to be flushed again until it tastes clean.
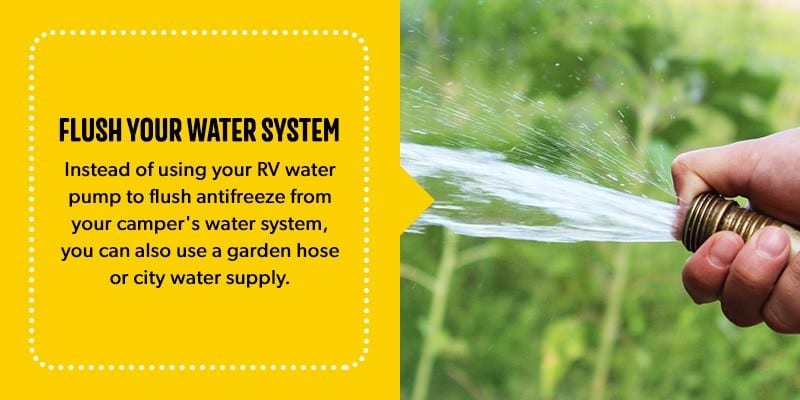
You may use a garden hose or the municipal water supply instead of your RV’s water pump to remove antifreeze from your camper’s water system.
Instead of turning on the RV water pump first, connect the hose to your water connection and continue with the same instructions as before. Camper De-Winterization Comprehensive Guide
5.) SANITIZE YOUR WATER SYSTEM
Sanitizing your RV’s water system is the second most important thing to do while de-winterizing it. Sanitizing your water system is necessary regardless of whether or not you used non-toxic antifreeze to winterize your plumbing system.
Bacteria and mold may develop in water pipes while they are dormant for months. Here’s how to disinfect the water system in your RV:
Put stoppers in all the drains and make sure they’re all closed.
For every 15 gallons of fresh water in your tank, use a quarter cup of household bleach.
Combine the bleach with water in a gallon jug.
The freshwater tank has to be refilled with the bleach water combination.
Completely saturate the potable water tank.
You need to activate the water pump and turn on all the taps.
Turn on the water until you notice the bleach odor, and then turn off the water.
For best results, let the solution soak in the water tank and pipes for up to 12 hours.
Stop the flow of water and dry out the system.
Fill up the tank with clean drinking water.
Turn on the water pump and open all the taps to flush the system.
Run the water until the bleach odor disappears.
It’s crucial to let the bleach rest in the RV water system long enough to kill out any germs. However, bleach in water lines for an extended period of time might accelerate the deterioration of synthetic seals.
A bleach solution should be allowed to rest for a minimum of a few hours and no more than 12 hours in order to properly clean your water system without destroying plumbing components.
6.) LOOK FOR LEAKS
Be sure there are no leaks in your RV’s plumbing system before the season begins. Once the fresh water tank is full, you may pressurize the water system by turning on the electric pump. Once the desired pressure is reached, the pump will automatically turn off.
Just wait a few minutes and see if you can hear the pump start up again. There is a leak in the piping if the pump turns on and off repeatedly or doesn’t turn off at all.
Find the source of the leak by inspecting the plumbing and searching for wet areas under sinks. Look for signs of leaking around the toilet’s rim.
Water damage to your RV may also result from undetected leaks inside. As soon as you discover a leak in your camper, fix it or have an RV repair business do it for you.
7.) EXCHANGE PROPANE TANKS
Propane users, please reconnect the line and secure the tanks to the RV. Open the propane valve a crack to make sure the hose is securely in place. Use a sponge or a bottle of soapy water to clean each of the hose adapters.
Look for the appearance of bubbles, which might indicate a propane gas leak. Make sure the connection is secure by tightening the fitting and doing so again.
Get the propane tanks in your RV filled up at a gas station that specializes on that fuel. There are states that mandate regular recertification of propane tanks.
Make sure your propane tanks haven’t expired and find out when they need to be recertified if your state mandates that you do so.
8.) PROPANE APPLIANCES
After reinstalling your propane tanks, open the gas line to each appliance to make sure they are all operating correctly before closing it again. Be sure the water heater is full before testing it.
Check with a professional RV servicing if any of your gas-powered appliances are malfunctioning. A professional should always be called in to fix any problems with propane or ignite.
9.) CONFIRM THAT YOUR 120-VOLT APPLIANCES WORK
If you’ve confirmed that your propane appliances are in good working order, you may go on to checking out your 120-volt devices.
Electricity sources of less than 30 or 50 amps may cause problems for high-draw equipment like air conditioners and microwaves.
Close the doors and wait for the refrigerator to cool to room temperature before testing it in electric mode. When you are parked in a campsite with access to electricity, you may reconnect the cable.
10.) CHECK THE MOTOR IF APPLICABLE
You should examine the RV’s engine by ensuring sure the fluid levels are correct and the lights and controls are in working order. Take a look at the power steering, gearbox, oil, brake fluid, engine coolant, and windshield washer fluid levels.
Before taking your RV out for its first camping trip, make sure all fluids are at the proper levels by having it serviced or topping up any low containers. Get your RV checked out by a professional technician if you suspect a leak in the engine.
Get in the driver’s seat, make sure all the fluids are where they should be, and then start the car. Verify sure the dashboard lights, the front and rear lights, and the windshield wipers are all operational. Get your RV checked by a professional technician if any warning lights turn on.
11.) PUT YOUR RV GENERATOR THROUGH ITS PACES
Do a quick oil check on your RV’s generator if you have one. Get a professional to check your generator if the oil level is low.
You should inspect the exhaust system for any damage before you use the generator. The exhaust system of a generator may be severely damaged if it is used while in a damaged state.
Turn on the generator and give it a go after checking the emissions. Your RV’s generator should fire up without a hitch if you ran it a few times before putting it away for the winter.
If the generator was never used during storage, you should run it at half load for a few hours. For safe weight capacities, please see the user guide.
Have it checked out and fixed if your generator surges or won’t start. Camper De-Winterization Comprehensive Guide
12.) CHANGE FILTERS
As part of your RV’s spring cleaning, be sure to replace the water and air filters. During a busy camping season, air filters may get clogged with dust and debris, so it’s important to start the season with clean filters.
Keeping your air conditioner and water systems’ filters clean can also help them run more efficiently and use less power.
When it comes to replacing the filters in your air conditioner and water heater, it’s important to choose the right size of filter for each. Make sure the filters fit tightly so they can trap as much dust and germs as possible.
13.) A/C AND WINDOWS SHOULD BE INSPECTED AT THIS TIME
Check the functionality of your RV’s windows and vents by opening them up as part of your spring cleaning routine. The optimum air flow provided by your camper’s air vents will keep you comfortable and dry throughout the summer.
To prevent a buildup of hazardous gases inside your RV, you’ll want to make sure your air vents are in good working order before you turn on the heater again this autumn.
When you pull your RV out of storage for the first time in the spring, opening all of the windows will let in fresh air and help revitalize the vehicle.
14.) VERIFY SAFETY GEAR
Make sure your recreational vehicle’s safety equipment is in good working order before setting out on the road. A fire alarm, fire extinguisher, carbon monoxide detector, and LP detector all fall under this category.
Put in fresh batteries in anything that relies on batteries for safety. Put your smoke alarm and CO detector through its paces. Be familiar with the warning signs of carbon monoxide poisoning and how to spot and fix a leak in your recreational vehicle’s gas tank.
If your fire extinguisher is older than the date it was manufactured, you should get a new one. Shake and tap the bottom of your RV’s dry powder fire extinguisher to dislodge any powder that may have gathered there while it was in storage. Camper De-Winterization Comprehensive Guide
Learn how to use the RV’s fire extinguisher and familiarize yourself with the sounds of the various alarms. An incident-free RV camping season is possible with some forward planning for safety.
15.) FILL IN THE GAPS IN YOUR FIRST AID KIT AND EMERGENCY STORAGE
In addition to checking all of your RV’s safety features, one important element of RV spring preparation is replenishing your RV’s first aid and emergency supplies before heading out on your camping trip this summer.
Medicines and first aid supplies should be checked for expiry dates and replenished as needed. Throw away any stale dry goods and stock up on bottled water before hitting the road in your RV, just in case.
Extra oil and coolant, hoses, batteries, leveling blocks, and pliers are just some of the RV repair gear that should be in your emergency kit.
16 – REGISTER AND CHECK YOUR INSURANCE COVERAGE
Make sure your paperwork is in order once you’ve de-winterized your RV’s batteries, water system, propane, and engine. Verify sure your RV’s insurance and emissions sticker are up to date as well as your registration.
Even if having insurance on your towable RV isn’t required by law, it is still a good idea to have in case of an accident.
Keep all of your RV paperwork in an easily accessible location. You will be relieved to have everything in order in the event of a traffic stop or accident. Camper De-Winterization Comprehensive Guide
Final Thoughts
Start of the camping season is a great opportunity to do some RV spring cleaning in addition to the necessary de-winterizing duties.
So that you can hit the road in pristine condition for your first camping trip of the season, here are some RV cleaning suggestions:
Put on the hose and give the outside of your RV a good scrub to get it looking like new for the new camping season. RVs have delicate paneling that has to be washed carefully, so it’s best to start at the top and work your way down.
The winter may have brought unwanted guests inside your RV in the form of bugs, spiders, or even mice. The water heater, the refrigerator’s drawers, and any other hiding places should all be checked.
In order to maintain a steady supply of cool air throughout the summer, it is important to regularly clean your fan blades and air conditioner’s filters with warm soapy water.
In order to ensure a complete cleaning, you should disassemble the fan and wash its individual parts in a sink, as well as wipe the fan housing with an all-purpose cleaning spray and a soft cloth.
Take off the screens from your RV’s windows and give them a gentle washing with some soapy water. Screens may dry naturally or be wiped off with a damp cloth. Clean the glass and the screens with glass cleaner and polish the glass. Camper De-Winterization Comprehensive Guide
Replace any bedding, pillows, blankets, towels, and washcloths, as well as any other items you may have removed for storage.
Remove the dust that accumulated throughout the winter by vacuuming the RV’s flooring and inside the cupboards.
Use these RV spring cleaning suggestions to get your RV road-ready as soon as possible.